Friday, December 30, 2016

Browning Ground Beef - Beginner


Browning Ground Beef is something that many recipes call for.  It is very easy to do.

When buying ground beef for this take note of the fat content.   Regular ground beef has a 20% fat content.  Other things such as ground chuck, ground sirloin may have as little at 5% fat content.   Depending on what you are doing with the meat you may want more or less.  Remember fat adds flavor but you may not want to have it overpower the other parts of a dish.  If you are eating it by itself, you may not want to slickness of the fat to complicate the texture of the meat.

Time Needed:
        15 minutes

Ingredients:
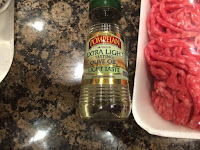
Ground BeefOlive Oil

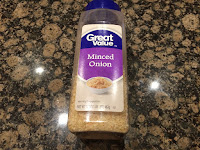
Minced Onion


    1 lb ground beef. (the photo is of 3 lbs of ground beef. I was making for multiple meals)
    Salt  -  1 teaspoon
    Minced Onion
    Olive Oil - 1 tablespoon

Tools:
    12-Inch Frying Pan 
    Wooden Spoon/Spatula 
    Platter  
    Paper Towel

Instructions:


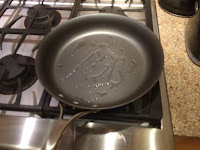
1) Place your frying pan on the stove and turn up the heat to medium high

Frying Pan

2) Once the pan is hot add your tablespoon of oil.   Be careful in that it might splatter.  Now coat the pan with the oil by tilting the pan from side to side.   The idea is to coat the pan so the meat does not stick.   I chose Olive oil since it adds a little flavor.  You can use pretty much any oil remembering that the oil will add flavor.

3) Now add the meat.
Browning Ground Beef

4) Now add the salt and minced onion.

Browning Ground Beef

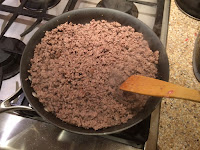
5) You now need to use your spoon to break up the meat into little pieces.  While you are doing this you want to turn the meat over and over so it cooks evenly and does not burn.  This is where experience really helps.   You may want to turn up to heat or down the heat so things cook best without burning.

If your stove is hot, cooking the meat will only take 5 minutes or so you need to keep stirring and pay attention.

Browning Ground Beef

6) Once all of the red is gone from the meat and it is nice and brown take the pan off of the heat.

Browning Ground Beef


7) You now want to transfer the meat to platter to keep the meat from soaking in the fat and keep from continuing to cook.  Put a couple of paper towels on the platter to soak up the fat that is still in the meat.  Use your spoon to transfer the meat from the pan to the platter.

8). You are done.


Ground Beef and Rice


In this case I served the browned ground beef over the rice we made earlier .   Very yummy and a very hearty meal.


Making Rice - Beginner


Rice is aa staple food for much of the world.   It forms the base for many dishes in our household.    Many people will wash the rice before cooking to remove starch.  Many people will soak the rice before cooking to reduce the cooking time.   Most of the time I do neither.

The other thing to remember is there are many varieties of rice.   Don't let that get you conFUSEd.  Try them all out.   Read the instructions before you cook, some need a little more water or cooking time, some need a little less but the process is pretty much the same.

The Rice I use the most is a variety called Jasmine.  I think it has the best flavors.

Time Needed:
        30 min

Ingredients:
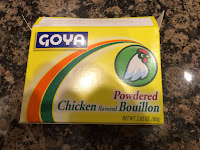
Chicken BouillonMinced Onion

Rice
Bouillon/Soup Base
Minced Onion
Salt

Equipment:
Cooking Pot

Wooden SpoonHot Pad

Cooking Pot - 2 to 5 Quarts in size
4-cup Measuring Cup
Spoon
Hot Pad

Instructions:

RiceMeasuring Cup

1) Measure out 1 1/2 cups of Rice and 3 cups of water.    The traditional ratio of water to rice is 2:1 and that is what we do.  Again you do not have to be exact.  A little more water will make the rice soupier, A little less and it will be dry.

Cooking Rice

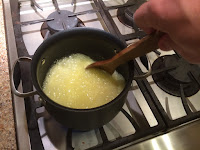
2) Pour the water into your pot and bring to a boil.  As you are waiting for the water to boil add your seasonings.  You can make the rice plain with just a pinch of salt (1/4 teaspoon) or you can make it a little better.

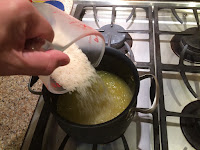
I usually add a packet (tablespoon) chicken bullion packet and a tablespoon of dried onion flakes.   I think it adds a nice subtle flavor to the rice.  This is where you can experiment a little each time you make the rice.

Cooking RiceCooking Rice

3) When the water has come to a boil add your rice to the pot and stir.  Make sure none of the rice has clumped up or you will get crunchy rice in spots.     When you do this the water will stop boiling for a few minutes.

Cooking Rice


4). Allow the mixture to come back to a boil.   Once it is boiling, stir the rice one more time to make sure it is mixed well and then put the lid on and turn the burner to simmer/lowest or just turn it off.

5) Now the hard part.   Wait for 20 minutes.  You can wait longer if you want but most rice needs at least 20 minutes to cook.   30 minutes will not hurt.  We have turned off the heat in the step above so you should be fine.

Cooking RiceFluffing Rice

6) It should be ready.  Before serving you need to "fluff" the rice.  All that means is to stir it up so that all of the individual grains of rice art sticking to each other.

Enjoy.   You have just made a base for many meals to come or you can eat it just as it is.


Stove Top Stuffing - Beginner


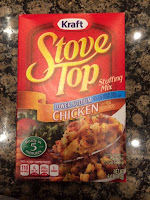
Stove Top Stuffing

Everyone loves Stove Top Stuffing.   There are various flavors.  The most versatile is the chicken flavor since it goes with almost everything.  In this case we are making the Low Sodium Chicken version.

Time Needed:
      15 minutes

Equipment:


4 Quart Covered Pot
2 cup measuring cup
Wooden Spoon
Knife
Hot Pad

Instructions:


1)  Measure 1 1/2 cups of water in your measuring cup and pour into your pot.   You do not have to be exact as long as you add more than is needed.  If you add less it will be crunchy.


2) Turn the burner on to high and start the water boiling


3)  measure out 4 tablespoons of butter.  You don't do this with a tablespoon but the marks on a stick of butter are 1 tablespoon each.  4 tablespoons is half of a normal stick of butter.   Again, this does not have to be exact and I usually add a little more butter than is called for.


4) Once the water is boiling and the butter has melted you can turn off the burner


5) Pour in the pouch of stuffing.   Now stir, stir, stir.    Use your hot pad to hold the pot!  If you try and stir without holding the pot you will make a mess.   You want to make sure that all of the stuffing mix is moist.  If it is not then you need to stir more.


6)  Once everything is stirred together, put the lid on for 5 minutes.  This allows the water to soak into the stuffing and make it all moist.


7) You are ready to serve.

Wednesday, December 7, 2016

About Confused Cooking

This blog is to help people get over being intimidated in the kitchen.  I notice that many people are just plain scared to cook anymore.  I guess they did not do it as a child and they have not had time to learn on their own.   Well this blog will help you.

Our motto is: Baking is science, Cooking is an art, and we are teaching finger painting.  

We are going to cook easy things.  Let you know what you need step by step and help you gain some confidence.  All of the posts will let you know up front if they are Beginner, Apprentice or Seasoned as far as the difficulty level.  

Now the food may not be overly healthy.  That can come later.  If you  can build up some experience and confidence with small things then you can go from there.